Python: How to Create Your Own Calculator App in 5 Minutes
Are you looking for an easy way to create a calculator app using Python? Whether you’re a beginner or an experienced programmer, this guide will show you how to build a functional calculator in just 5 minutes using Tkinter (a built-in Python library for GUI applications).
By the end of this blog, you’ll have your own fully working calculator app with a user-friendly interface. Let’s get started! 🚀
Why Build a Calculator App?
✅ Great for Beginners – It helps you practice Python and GUI programming.
✅ Useful in Daily Life – You can customize it for scientific calculations.
✅ Quick and Easy – With Python’s Tkinter, you can build it in minutes!
Step 1: Install Python and Tkinter
Before we start coding, ensure that Python is installed on your system. If you haven’t installed it yet, download it from Python’s official website.
Tkinter is included by default in Python, so you don’t need to install it separately.
To confirm Tkinter is installed, open Python and type:
If you see the message "Tkinter is available!", you’re good to go! 🎉
Step 2: Create a Simple GUI Calculator
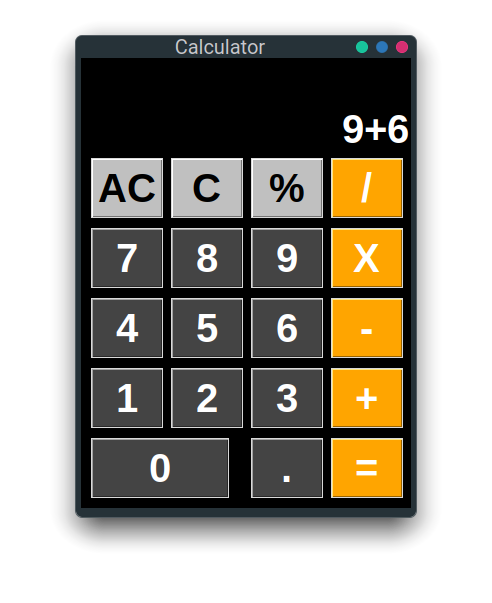
Now, let’s create a basic calculator using Tkinter. The app will have buttons for numbers (0-9) and basic operations (+, -, *, /, =).
Code for the Calculator App
from tkinter import *# Function to update the expressiondef click_button(event):global expressiontext = event.widget.cget(“text”)if text == “=”:try:result = eval(expression)input_var.set(result)expression = str(result)except Exception as e:input_var.set(“Error”)expression = “”elif text == “C”:expression = “”input_var.set(“”)else:expression += textinput_var.set(expression)# Initialize windowroot = Tk()root.title(“Simple Calculator”)root.geometry(“350×500”)# Variable to store user inputexpression = “”input_var = StringVar()# Entry widget to display input/outputentry = Entry(root, textvar=input_var, font=”Arial 20″, bd=8, relief=SUNKEN)entry.pack(fill=X, ipadx=8, pady=10, padx=10)# Button layoutbuttons = [[“7”, “8”, “9”, “/”],[“4”, “5”, “6”, “*”],[“1”, “2”, “3”, “-“],[“C”, “0”, “=”, “+”]]# Creating buttons dynamicallyfor row in buttons:frame = Frame(root)frame.pack()for button in row:btn = Button(frame, text=button, font=”Arial 20″, padx=20, pady=20)btn.pack(side=LEFT, expand=True, fill=BOTH)btn.bind(“<Button-1>”, click_button)# Run the main looproot.mainloop()
Step 3: How This Code Works
🔹 Tkinter is used to create the GUI.
🔹 The Entry widget displays user input and results.
🔹 The click_button() function handles button clicks.
🔹 The eval() function computes the mathematical expression entered.
🔹 The calculator supports addition, subtraction, multiplication, and division.
Step 4: Running Your Calculator App
1️⃣ Copy the code into a Python file (e.g., calculator.py).
2️⃣ Run the script using the command:
3️⃣ Your calculator app will open! 🎉
Now, try clicking the buttons, perform calculations, and see the results instantly.
Step 5: Enhancing the Calculator (Optional Features)
Once you have the basic calculator working, you can add more features to make it even better!
🔹 Add a backspace button (⌫)
🔹 Include square root (√), power (x²), or percentage (%)
🔹 Style it with different colors and fonts
🔹 Convert it into a scientific calculator
Example: Adding a Backspace Button
Modify the click_button() function like this:
Then, add a “⌫” button to the layout:
This will allow users to delete the last entered digit instead of clearing everything.
Conclusion
Congratulations! 🎉 You have successfully created your own Python-based calculator app in just 5 minutes.
What We Covered:
✅ Installing Python & Tkinter
✅ Building a basic calculator UI
✅ Handling button clicks for calculations
✅ Running the calculator
✅ Adding extra features
Now, go ahead and customize your calculator the way you like. Happy coding! 🚀
💡 What’s Next?
If you want to convert this into a mobile app, try using Kivy instead of Tkinter! Would you like a tutorial on that? Let me know in the comments! 😊
For more information please follow my blog: https://learnwithsplhub.com/